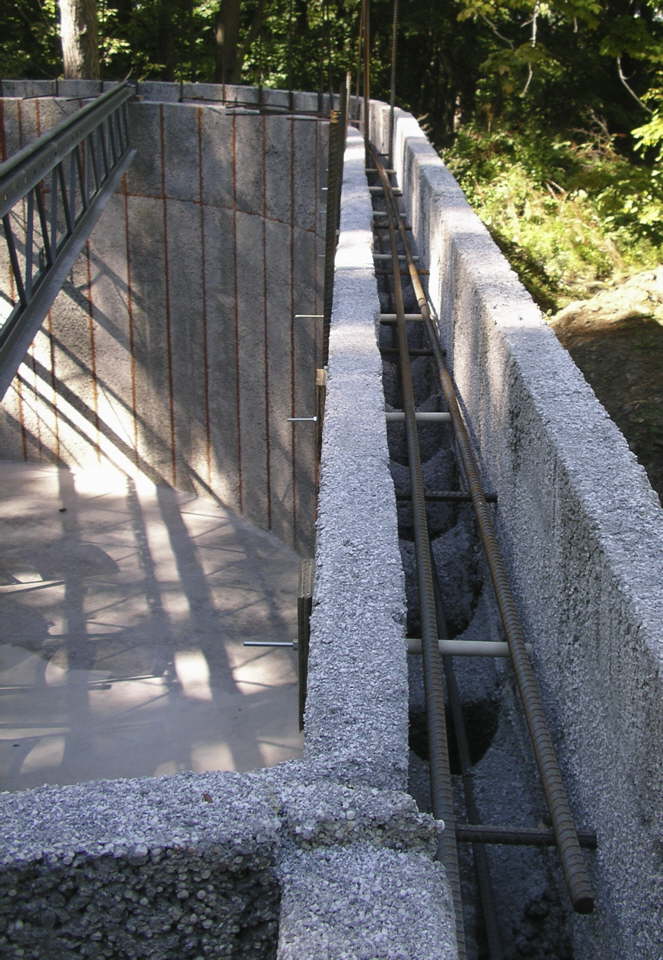
This shows the preparation for the bond beam on a straight part of an exterior wall, in this case, the wall immediately under the front door. I used a 9/16" paddle bit with an extender and electrical tape on it to mark the depth I wanted to drill the holes for the #4 rebar we're using to support the horizontal bond beam rebar. One cross bar every other node seems to be doing the job. The holes for these cross pieces don't reach to the outside of the wall, and are sealed with foam glue on the inside. For the straight wall, once all the nodes were removed, nothing was left to connect the outside piece of Rastra on the inside and the outside. So I put all thread (aka thread stock) in to keep them from expanding. I wanted to be able to remove the thread stock and to keep from squeezing the Rastra together too much, so I drilled all the way through the Rastra with a 5/8" paddle bit on the extender, and then put a 12" long piece of CPVC water pipe in the hole to separate the thread stock from the concrete. The CPVC was smooth enough that 90% of the tubes tapped right out once the concrete had set up. I drilled the holes for the tubes 1" lower than the holes for the cross pieces so that concrete would completely surround the horizontal rebar in the bond beam. On the outside walls we used #5 rebar for the bond beam, but considering the higher load and not needing to do any bending, we used #6 rebar on the partition wall and on the interior stair well wall.
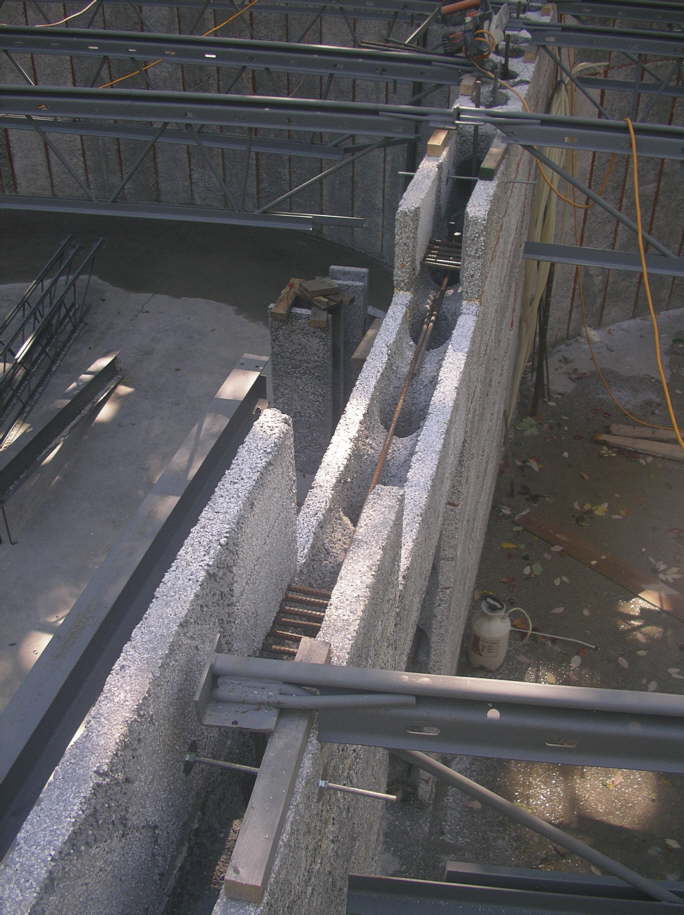
This shows the preparation for the bond beam on the partition wall above the doorway. Steve had an inherent dislike about the CPVC penetrations, and considered that the chance of moisture following steel in to the wall and rusting the bond beam rebar was not an issue on an interior wall, so for these walls, we used 3/8" all thread and fender washers both for holding up the bond beam rebar and for maintaining proper separation of the Rastra sides. You can also see here the extra cross pieces I put in to support the ends of the doorway beam, and the 15" 2x2's I used to spread out the load at the ends of the joists. The all thread is extra long at either end of the doorway as it also served as the attachment point for 2x6's used to reinforce the Rastra along the sides of the beam where all thread couldn't be placed. I screwed 2x4's to the middle part of those 2x6's making the cross section a "T" shape.
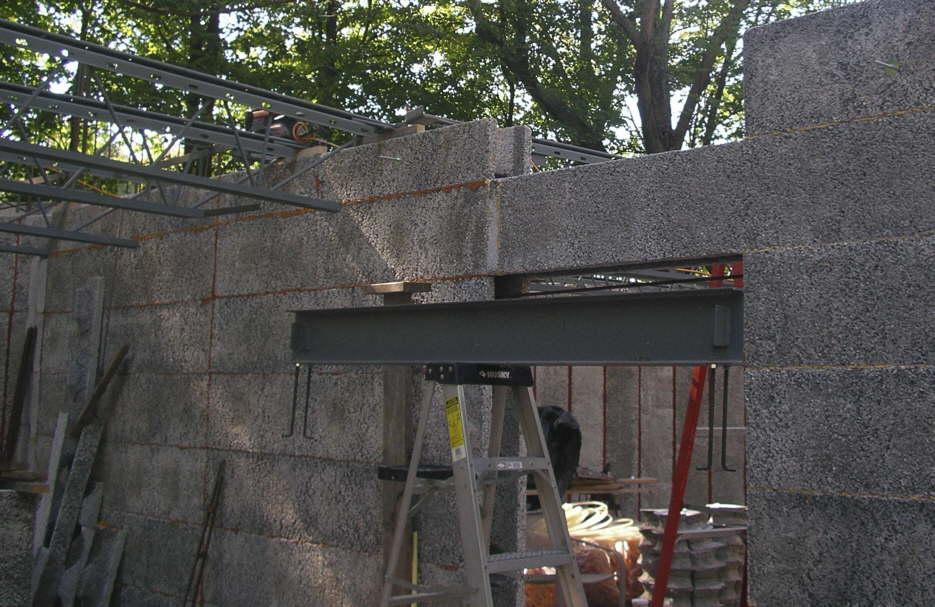
Here's the beam for over the doorway sitting on top of a ladder with it's concrete anchors bolted on. Traditionally beams are placed by creating "beam pocket" placeholders to which the concrete anchors are fastened, and then after the concrete is strong enough to support the weight of the beam, the pocket piece is removed and the beam is bolted to the anchors. Here, however, the beams were lightweight enough that the entire beam could be supported by the Rastra before the pour.